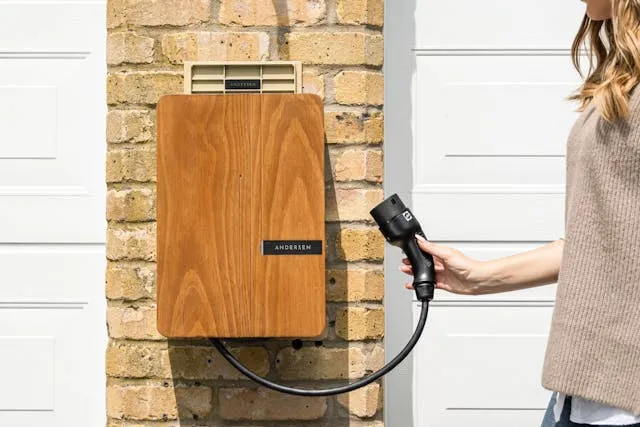
The rise of electric vehicles (EVs) has reshaped the way people think about transportation. According to the International Energy Agency (IEA), there were over 26 million electric cars on the road worldwide in 2022, a number that continues to grow rapidly each year. With more EV owners than ever, the demand for electric car charger installation at home is at an all-time high.
Installing a charger at home ensures convenience, cost savings, and peace of mind, but the process requires careful planning. In this guide, we’ll walk you through the step-by-step process of a proper electric car charger installation, from preparation to testing.
Also Read: Discover the Best Bluetooth & Inkless Printers by MUNBYN for Effortless Wireless Printing
Why Install an Electric Car Charger at Home?
Before diving into the steps, it’s important to understand the benefits:
- Convenience: Charge your EV overnight instead of relying on public stations.
- Savings: Home charging is typically 40–60% cheaper than using public fast chargers.
- Property Value: Homes with EV chargers can see an increase in resale value as more buyers look for eco-friendly amenities.
Step 1: Assess Your Charging Needs
Not all EV chargers are the same. The first step is determining what level of charging you require.
- Level 1 Charger: Uses a standard 120V outlet. Easy to set up but charges slowly—around 3–5 miles of range per hour.
- Level 2 Charger: Requires a 240V outlet. Much faster, providing 20–30 miles of range per hour, and the most common choice for homeowners.
- Level 3 Charger (DC Fast Charger): Charges extremely fast but is expensive and usually reserved for commercial use.
For most homeowners, a Level 2 charger is the best balance between cost and performance.
Step 2: Evaluate Your Electrical Panel
Before moving forward, check if your home’s electrical panel can handle the additional load of a charger.
- A Level 2 charger typically requires a dedicated 40-amp circuit.
- If your panel is outdated or at capacity, you may need an upgrade, which can cost between $500–$2,000 depending on complexity.
Consulting with a licensed electrician at this stage is essential to avoid overloads or safety hazards.
Step 3: Choose the Right Charger
When selecting a charger, consider:
- Brand reputation (well-known options include ChargePoint, JuiceBox, and Tesla Wall Connector).
- Smart features like Wi-Fi connectivity, energy monitoring, or scheduling.
- Weather resistance if the unit will be installed outdoors.
- Cable length, usually between 18–25 feet, for flexibility.
According to EnergySage’s 2023 EV Charger Guide, smart chargers can improve efficiency and lower electricity bills by up to 15% when paired with time-of-use rates.
Step 4: Obtain Necessary Permits
Most municipalities require permits for electric car charger installation. These ensure the installation meets local building and electrical codes.
- Permit costs range from $50 to $200 depending on your location.
- In some areas, inspection by a local authority may be required before activation.
Skipping this step could result in fines or issues when selling your home.
Step 5: Hire a Licensed Electrician
While some handy homeowners might consider DIY installation, a licensed electrician is strongly recommended for safety and compliance. An electrician will:
- Install a dedicated 240V outlet or hardwire the charger.
- Ensure grounding and circuit protection.
- Perform load calculations to confirm system compatibility.
- Secure the charger to the wall or pedestal mount.
Professional installation costs typically range from $500 to $1,500, depending on wiring complexity and distance from the electrical panel.
Step 6: Install the Charger
Here’s a simplified breakdown of the installation process:
- Shut off power at the electrical panel.
- Run wiring from the panel to the charger’s location.
- Mount the charger securely on a wall or pedestal.
- Connect wiring to the charger according to manufacturer guidelines.
- Restore power and check for correct voltage.
If outdoors, the unit should be placed under a weather-resistant cover for longevity.
Step 7: Inspection and Testing
Once installed, many jurisdictions require a city inspector to verify that everything complies with electrical codes. After approval, you should:
- Test charging your EV to ensure correct operation.
- Check Wi-Fi or app functionality if using a smart charger.
- Review safety features like ground fault protection.
Step 8: Optimize for Efficiency
Now that your charger is installed, maximize its use by:
- Charging during off-peak hours for lower electricity rates.
- Setting schedules via smart apps.
- Monitoring energy consumption to track costs.
Some utilities even offer rebates or credits for installing a home charger. For example, in 2023, over 35 states in the U.S. offered EV charging incentives, making it worth checking local programs.
Final Thoughts
A successful electric car charger installation requires more than plugging in a unit—it involves planning, permits, electrical safety, and the right equipment. By following these steps and working with a qualified electrician, you’ll ensure your EV is powered safely, efficiently, and conveniently from home.
As EV adoption continues to grow, having a home charging solution isn’t just a luxury—it’s quickly becoming a necessity. With the right approach, you’ll enjoy faster charging, lower costs, and the satisfaction of contributing to a greener future.
